Hello again! In the previous post I discussed a new ReShade effect I created, that would help with protecting certain areas of your screen with UI elements that might be negatively affected by other effects such as blooming ones.
While this effect is very valid in situations where the problem is isolated (such as the minimap in the previous post), it’s clearly not the best solution when you don’t want to limit how “hard” you want to go with visual effects such as HDR, Tonemapping, Blooming, etc., or you have other effects “bleeding” onto other parts of the final rendered frame.
This is very much the case with some AO effects that can appear in overlay to entire UI elements such as menus and even textboxes like chat windows.
An example of this problem can be seen in this screenshot:
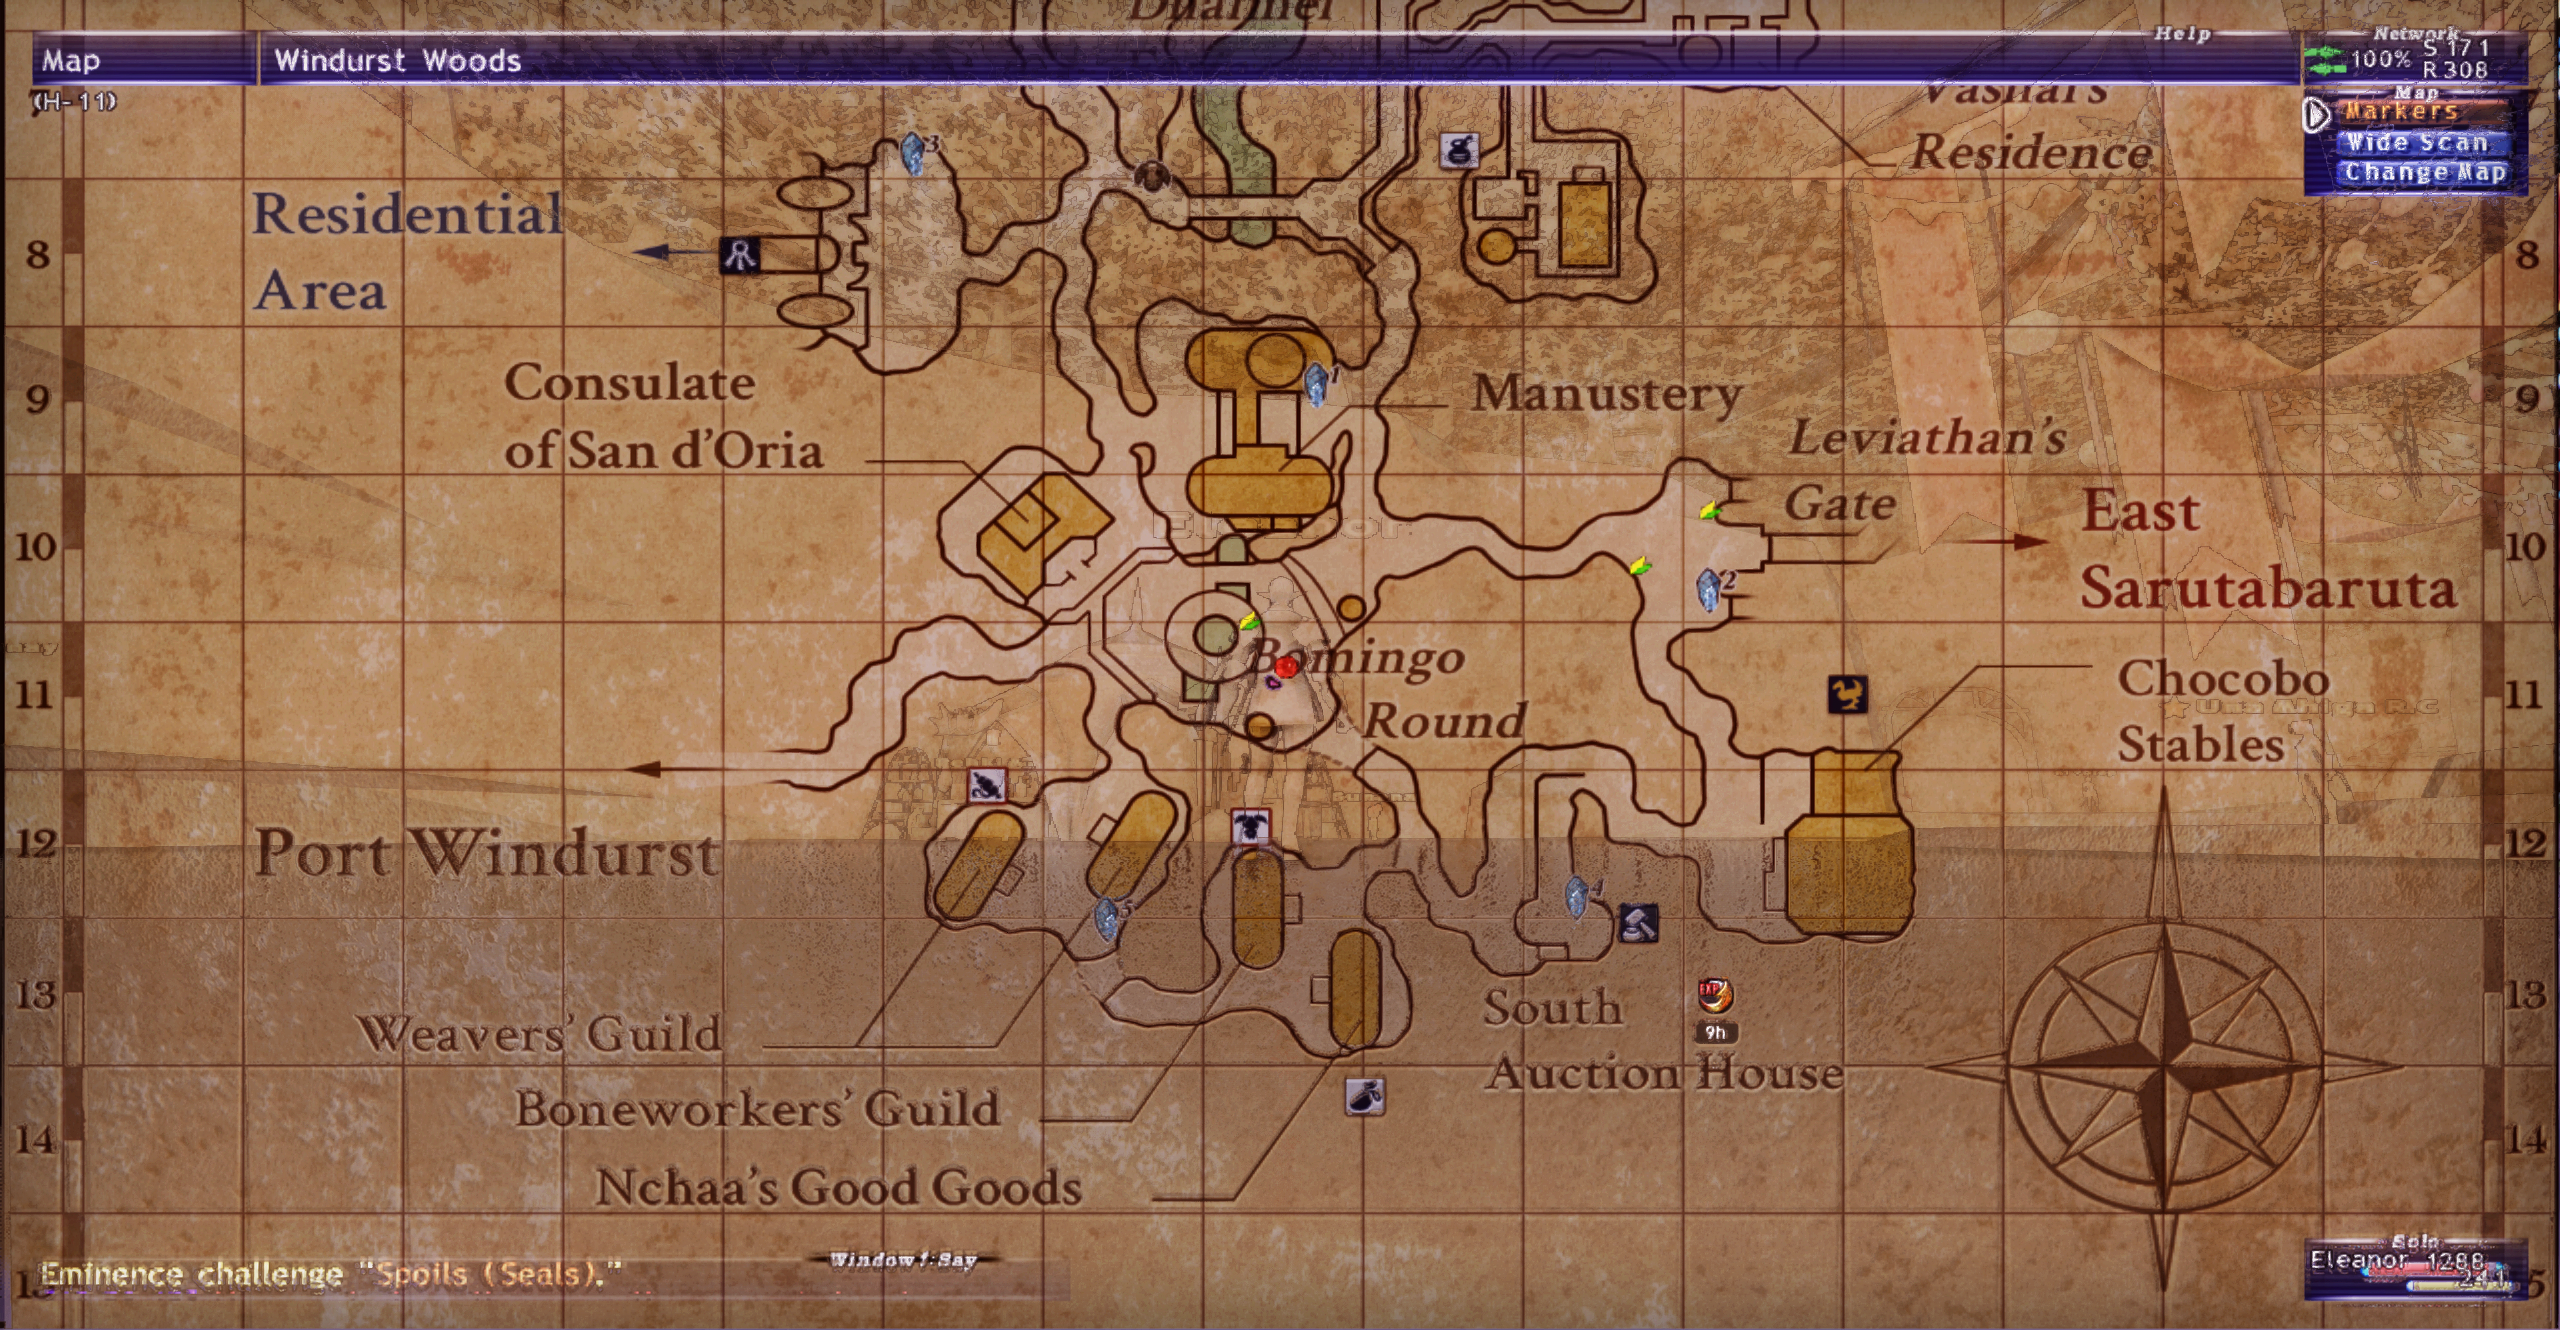
In this image, it is possible to notice the AO effect but also other artifacts, becoming such as they are applied as an overlay on a different, and therefore wrong, layer of the final frame (the map window in this case).
After countless hours of browsing the web in search of a solution I eventually stumbled in what is, in fact, the object of this post and, since I found the provided documentation not very intuitive because I sometimes can’t figure things without pictures, I’ll be providing a small setup guide.
Disclaimer: ShaderToggler has many different applications such as keybinding effects group for quick enable/disable/swap operations and much more. In this guide I’ll only discuss the add-on to the extent necessary to fix the problem mentioned at the beginning of the post.
Enters: ShaderToggler add-on
First and foremost: credits.
You can find this incredible ReShade add-on here: ShaderToggler Git Repository, and the releases page here: ShaderToggler Releases. At the first link you can also find instructions on how to set it up and chances are that’s all you need to figure out how it works.
Now let’s dive in the actual step-by-step guide.
Preparation
- Make sure you are using the Unsigned version of ReShade (second option on the download page of ReShade).
Mind that the Unsigned version does NOT benefit from being whitelisted by anti-cheat engines of some online games as the signed version does.
USE IT AT YOUR OWN RISK!
- Download the latest version of the add-on here.
- Extract the content to a folder of your choice and then copy/paste either the
.addon32
or.addon64
version of theReshadeEffectShaderToggler
file in the directory of your game executable, depending on the type of your appication/ganme (32bit or 64bit). In my case, since I'm working on FFXI, it will be the Play Online executable and since it's an old game running in 32bit mode I'll have to copy the.addon32
version. If you are unsure about which of the two will work in your case, just pick either and follow the next steps. As soon as you load the game you can open the ReShade UI and check in the log tab for errors. If there's something about ReShade being unable to load the add-on you can try and use the other version. - Rename the file to simply
ReshadeEffectShaderToggler.addon
. - Launch your application/game and check the Add-ons tab. Right under the default Generic Depth add-on, you should now be able to see something like this:

Staunching the bleeding
- In this step you might want to close the ReShade UI, go back to the application/game and open some menu or window where the problem appears, then leave that open and return the ReShade UI and the Add-ons tab.
- Expand the add-on tree and then the
List of Toggle Groups
. - Click on the
New
button.

- Set the new entry to Active by ticking the relative box. You can optionally rename this group by clicking on
Edit
, but for the next step just click onSettings
.

- In the newly opened window, you want to uncheck the
Catch all techniques
box. - Now you can proceed to enable just the effects that you want to "mask" from the UI. After this step this is my situation:

- You now want to browse the column on the left of the window and go through the list of addresses one by one (single click to select) while paying attention at the "preview" box at the bottom of the window.
- What you are looking for is the address that will show in the preview the application/game rendered without the UI elements you prepared in step 0. So something like the example below on the left as opposed to the right one.
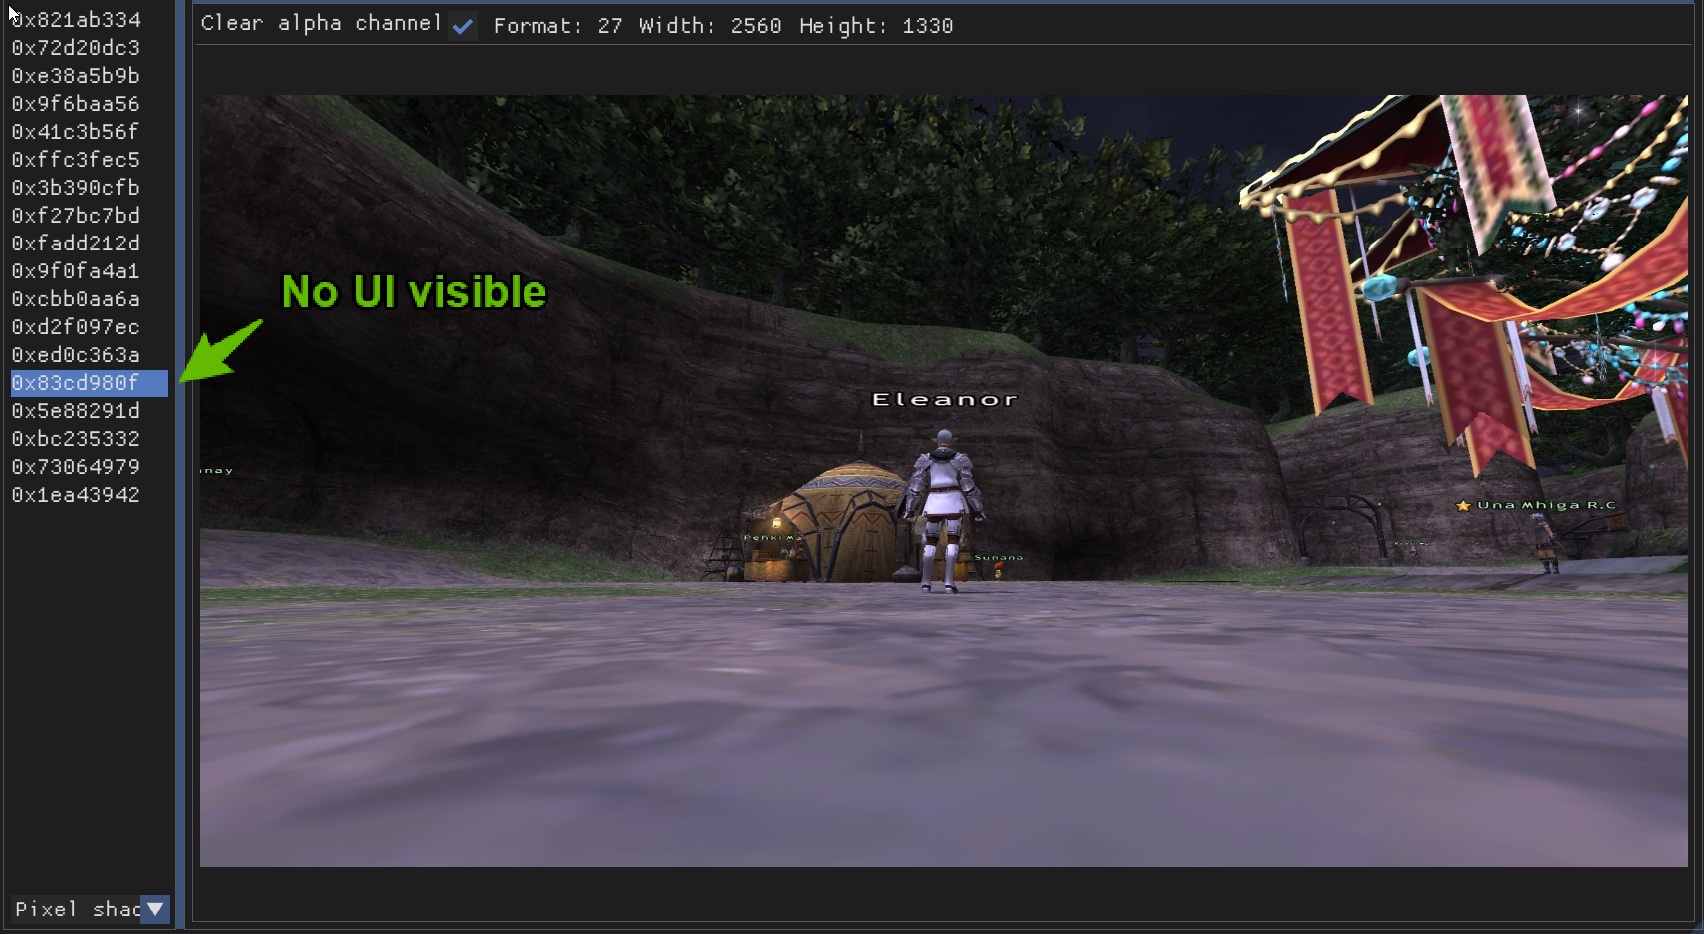
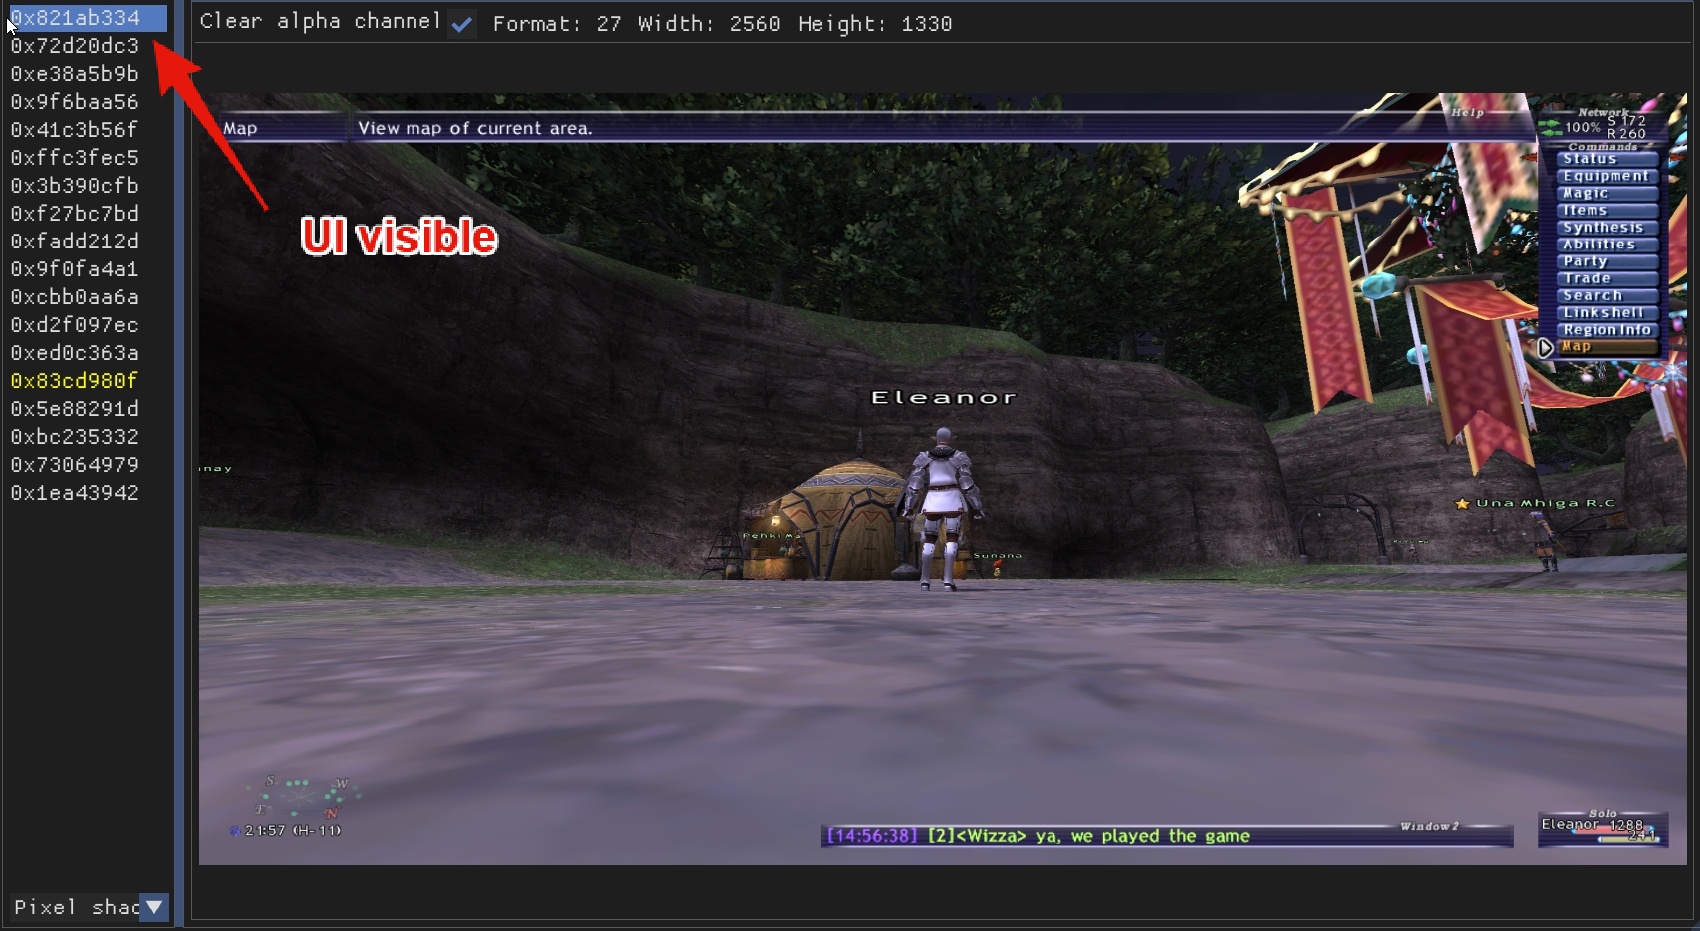
- Peek at the application/game in the background to make sure the effects you want to mask are now being masked correctly.
- Now simply double-click the pixel shader address to actually "attach" the group to it.
- Close the window and remember to click on
Save all Toggle Groups
.
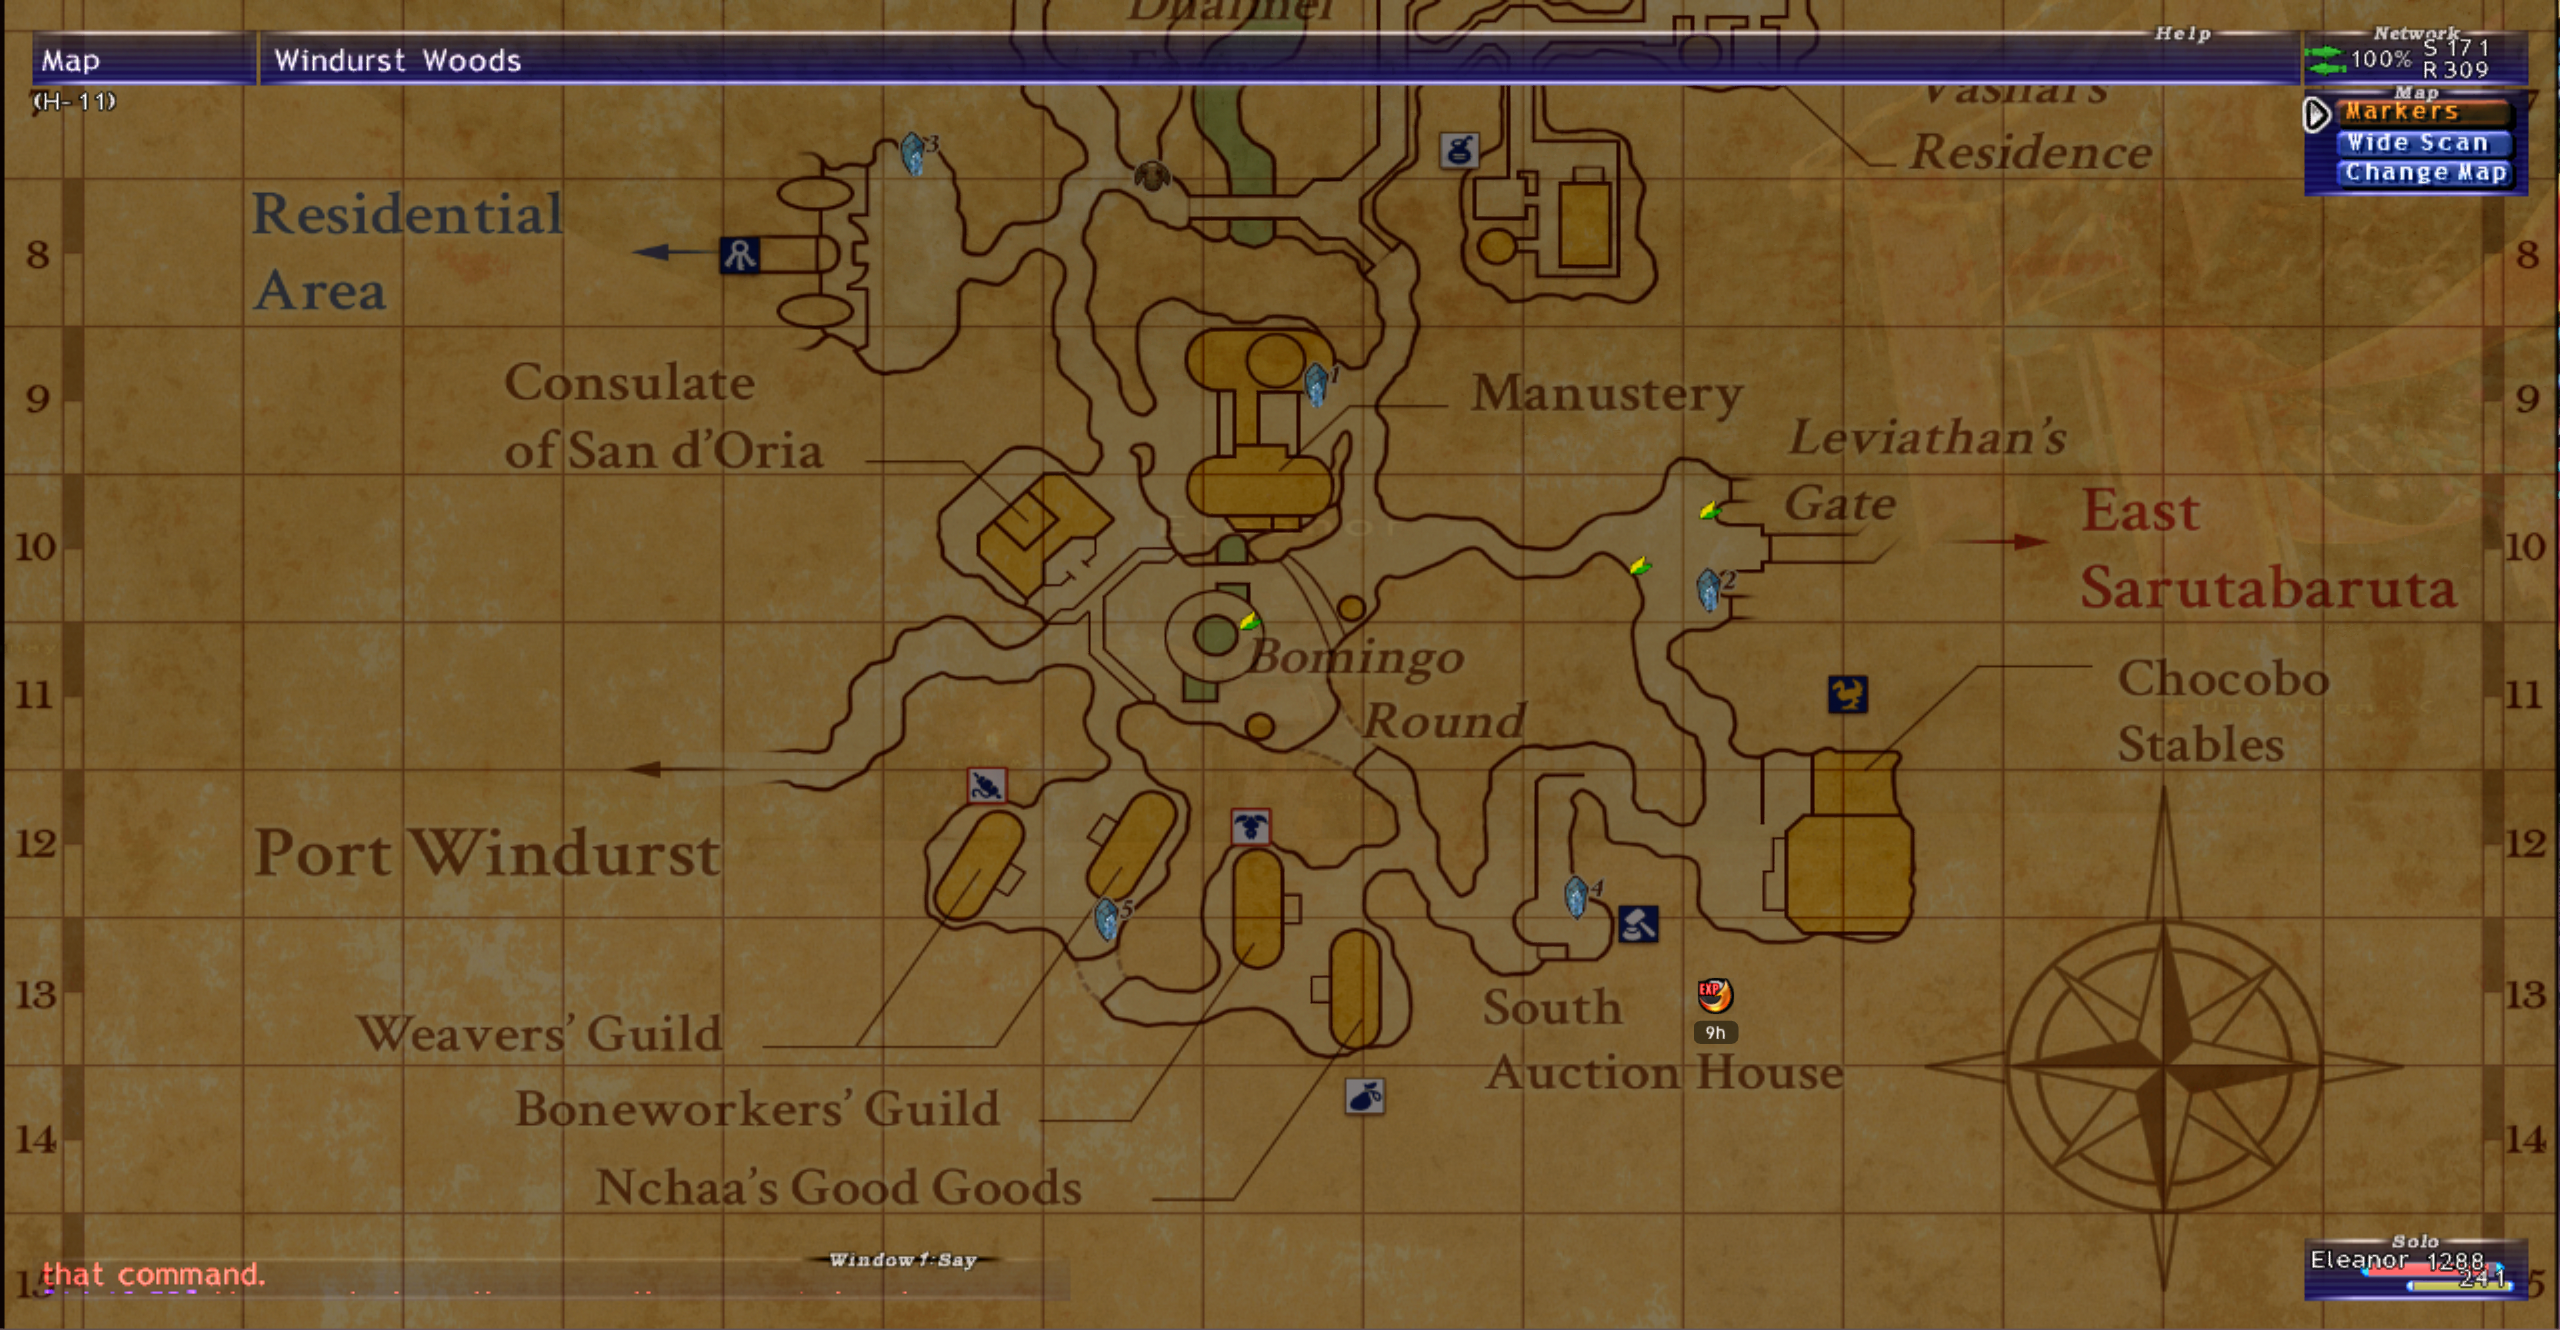
Here you can see the same frame from which I took first screenshot, now without any bleeding from other effects.
Final considerations
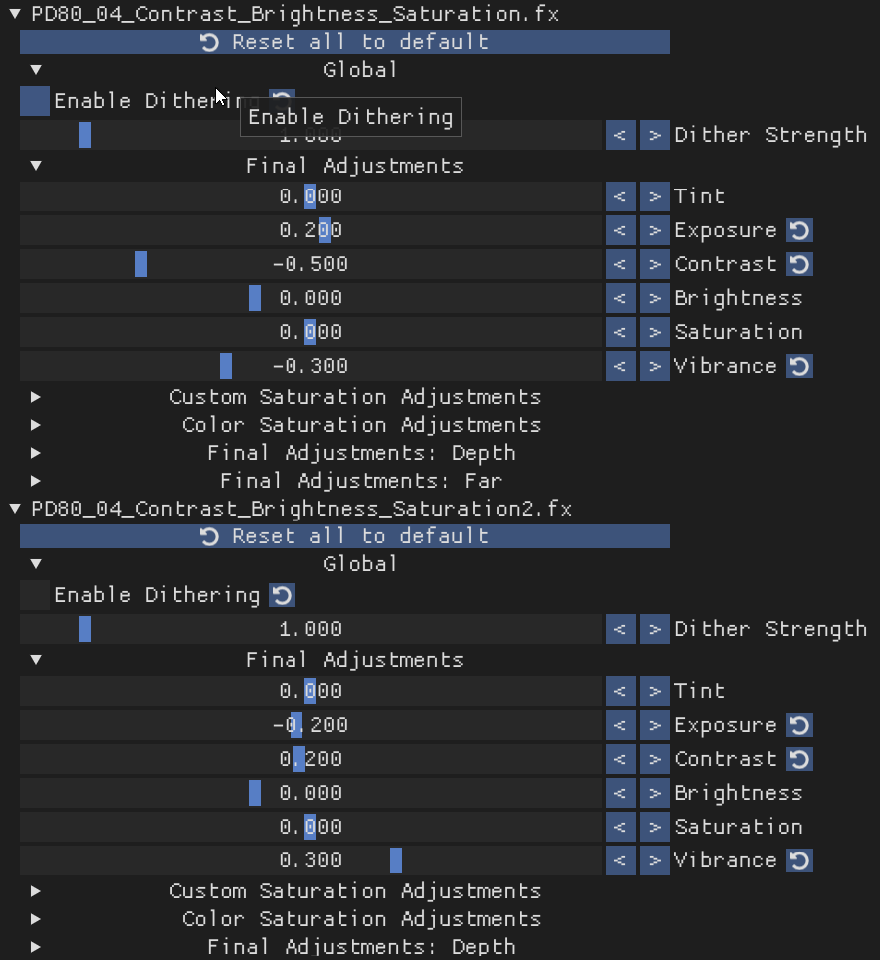
This whole process as the “downside” of now leaving the UI layer without any effect besides those that you are fine with applying to the entire frame. This limitation can be partially bypassed by adding in your effects list some image-adjustment shader such as PD80_04_Contrast_Brightness_Saturation.fx or similar ones, and duplicate it. Afterwards you can add one of the two in the Toggle Group created in the previous section of this guide and leave the other out. After this operation, you can simply use the effect outside the toggle group to change some contrast/brightness/saturation etc. to better adjust the visual aspect of your UI layer and then use the effect inside the toggle group to “revert” this effect on the application/game render. Down here is my setup (mind that for some effects it’s not as simple as to apply the same amount with inverse sign to revert the non-UI render to its original look!).
Again big big thanks to 4lex4nder for creating this amazing add-on without which I could no longer progress in perfecting my FFXI ReShade preset, please go check their repository for the original documentation and updates!
I hope you found this useful and I’ll see you next time! ❤️